OS/2.GURU Library
Reviews / articles about OS/2 eComStation ArcaOS
ArcaOS, eComStation, IBM OS/2 Warp
OS/2.GURU LibraryReviews / articles about OS/2 eComStation ArcaOS |
Operating systems ArcaOS, eComStation, IBM OS/2 Warp |

|

|
|
|
DATE: 2010-11-08 13:06:59 AUTHOR: vezhlys
eComStation is last and still quite strong continuation of original OS/2 operating system. It is developed by Serenity Systems (IBM and other developers) and they released a second version of it this year. I am going to write two or three articles about it (unfortunately I deleted my first half complete draft of this article so I don't know if it will be as good a second time as it is difficult to restore motivation after such mistake). Home and student licence allows to install this OS on 5 computers (if I am not wrong) but unfortunately it is not a strong point as the price is quite high and normal user will choose Windows or Linux. However, if you are loyal OS/2 user or some alternative OS fan you can support this efforts as they allow to stay OS/2 somehow alive. eComStation is more like evolution of OS/2 (and eComStation 2 is just evolution of the first version). Because of this eComStation feels quite old fashioned (if you look at UI) but it has some strong points and modern things which you won't find in many hobby operating systems (though they are generally free). I'll talk about that later. What is more, OS/2 has quite a big software base. This article will focus on installation procedure. I successfully loaded it on VirtualBox so I'll have some screenshots. Other articles will focus on usage and applications and I will test OS on the real hardware (VIA VT-310DP is alive again for this reason). I have never used any OS/2 version earlier and I tried eComStation 1.xx only several times so I could not compare them. However, I'll point out some things I read in the internet. eComStation comes in two CDs (you can download them as iso images to save some money) and third iso was with OpenOffice.org (however, the newer version was released recently). You need only first CD to install operating system. Second CD has additional free and trial (modern and legacy) software you can install. First CD is bootable. Firstly it loads boot loader with two options: first one boot from hard drive and second one to boot from cd. Of course, you need to choose cd at first. I want to warn you that you need to back up your hard drive before this step. Setup can ruin your partitions (it happened to me twice) especially if you have extended ones. My guess is that it tries to initialize hard drive somehow if it can't identify partitions correctly. This is where setup begins. Just after it loads you'll see big eComStation 2 boot screen.
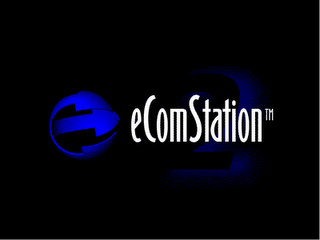
First boot screen It loads into check CD screen (similar to Fedora) where you can check if CD is ok or just skip this step and continue installation. If your CD writing utility didn't verify disk it is probably recommended to check a disk otherwise you are wasting your time IMHO.

After this step it finally tries to load setup application. It uses Scitech Snap graphics driver if video is supported (as far as I understood) or uses "new" Panorama (VESA) driver otherwise (included in this release). It loaded in all computers I tried. I guess these drivers works with quite big range of cards. Setup application is graphical and intuitive (it is eComStation original installer which differs from OS/2 but it is almost identical between both versions of eComStation).
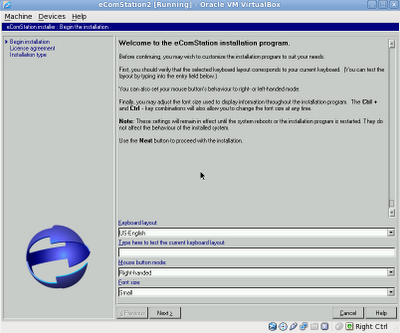
First setup screen
You need to choose keyboard layout, mouse button mode and font size (in the installer) in the first screen. You need to be careful here because some layouts doesn't support symbols needed to write a username and registration key. It is best to leave english layout here.
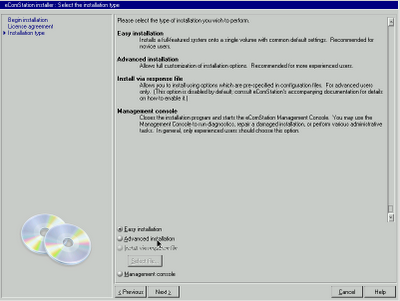
You must to agree with license agreement on the next step and after that to choose installation type. This screen is quite important as you can choose between easy and advanced installation. Easy one will have less steps before install. I chose advanced one and review will focus on it. Management console is something like recovery console on Windows I guess.
After that comes the most annoying part. You need to write registration name and registration key. You can't go further until it is valid. The worst thing is that registration name has 21 symbols and registration key consists of 4 lines with 22 symbols each. However you can create reg file (or download it from ecomstation.com after you registered your code) and load it here. Because of this I strongly recommend to add such file into iso file. If you forgot that you can create a supported partition and add file there (fat, hpfs, jfs) before install. I don't know if usb key supported at this point.
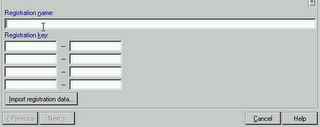
Next button activates automatically and you can go further. You need to select partition (volume) on the next step where you will install eComStation. Logical Volume Manager is included to create one if you need so. I guess eComStation requires primary partition. Later you need to format it or choose migration option.
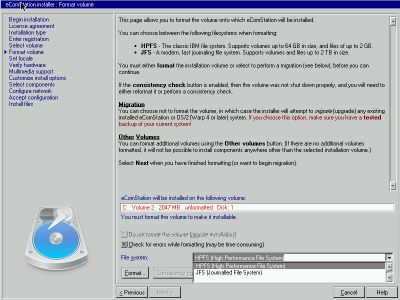
There are two file system options. HPFS (High Performance File System) is original OS/2 file system. However it has 64GB partition limitation and 2GB file limitation. JFS is modern, journalling file system which doesn't have such limitations. I chose JFS as it will have better compatibility with linux. It took around 20 minutes for a full 10GB format with JFS and 1.5 hour to format as HPFS. You can choose quick format too if you want (it takes several minutes).
You can change locale and timezone in the next step.
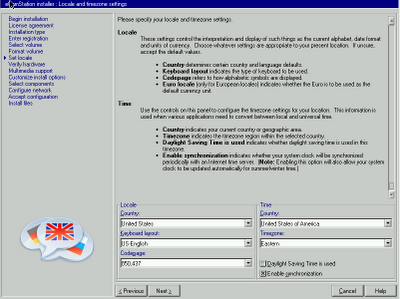
One more time you need to be careful here. I didn't have problems when time and timezone was changed, however locale changes led to installation errors on the second phase of the installation (WarpIN and KLIBC failed to installed leading to not fully installed and quite unusable system). Default locale didn't cause any problems in the future.
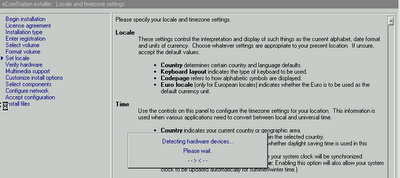
After you chose your locale setup starts to detect hardware and lists them.
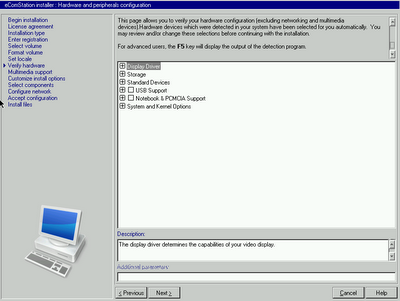
You can add additional drivers or remove them here or make some changes. Of course, this step makes sense only if you understand what you are doing. After that you go to multimedia support where you can choose audio driver (alsa by default).
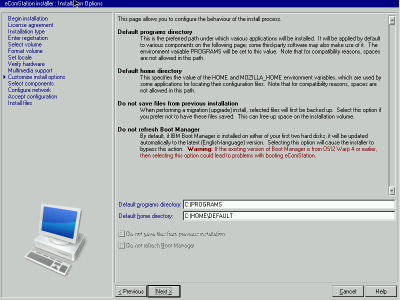
Further step requires to choose default programs directory (I left unchanged) and default home directory (I change to my c:\home\[myname]). You can also choose here to install boot manager or skip this option. eComStation installation manual recommends to use their boot manager as default. Later step allows you to choose which components or applications you want to install. Of course, this option is only available in advanced setup. Default setup is quite good but if you look through all list you might find some interesting things too (or some unneeded stuff too).
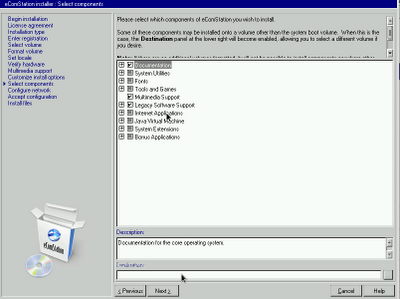
Select components
Later you need to configure network. This step consists of four separate windows (at least). You'll find connection types (LAN, point-to-point) and network types „TCP/IP, samba, IPX) in the first. Second window shows your network adapters (if they are recognised) with their settings and protocols to use. Later you'll need to specify TCP/IP settings (DHCP or manually) choose your computer name and finally specify workstation id (computer name) and domain.
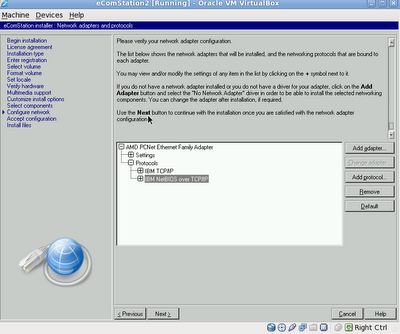
This is the last step which requires some manual changes. You accept the changes on the next windows system installation begins. Until this moment you can go back to the every step and reconfirm your decisions. Installation consists of two phases. The first phase starts just after you accept your configuration and it installs base eComStation system files and initial configuration. It took me about 7.5 minutes on real hardware and about 10 minutes on VirtualBox (though it strange for me as system was much faster on VirtualBox). Progress bar doesn't show real progress it just fills up with blue/white colour continuously.
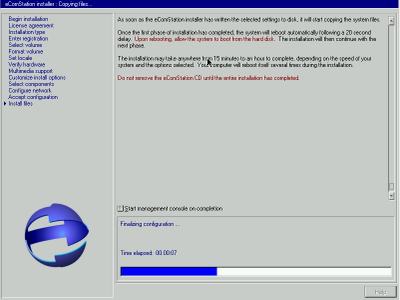
When the first phase ends, system restarts. CD must be kept in the CD-ROM but you need to choose boot from hard drive this time. This is the first time then eComStation boots however you will see the same installer window. Phase 2 starts which installs various additional software (WrapIn, firefox, java and so on) and makes final configuration. If installation fails during this phase you will be able to boot into eComStation and use it, however, some features will be missing and will work incorrectly.
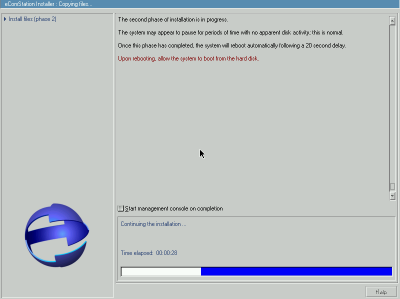
If phase 2 ended correctly the system will restart second time. You can remove CD. The system will boot into desktop this time. Post-install configuration will run. You can change various things in it (screen resolution, UI settings, user name, network user name and password, install printer and acpi). Some changes make require additional reboot (like screen resolution). The system is fully usable now. Default software includes Firefox 3.5.3 (old flash 5), Thunderbird 2.0.0.22, Java 1.4.2, some games, cd burning and multimedia programs, various utilities and other applications. If you have one NIC and use DHCP (or manually configured it) it will have internet too (otherwise you need some configuration). I will write about some applications in the other article.
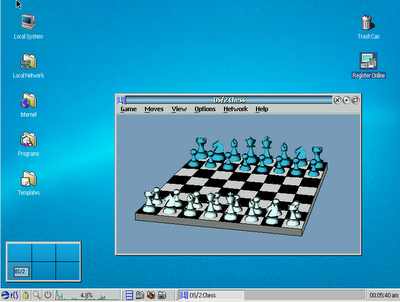
eComStation desktop and OS/2 chess This is all for now. I don't know when will be the next article but it will cover usage experience and applications (not default too), maybe some configuration issues. It depends on how long it will be. Source of the review: http://tortoiseit.blogspot.com
Comments:
|
|
|||||||||||||||||
|
ArcaOS 5.1.1 - DOS works againDOS virtual machine works again (it was working on Core 2 Duo, and didn't for i5). Install ArcaOS in UEFI mode to use DOS VM. |
PNG icons on DesktopeCo Software: it's a significant achievement that we have created PNG icons engine for OS/2 Desktop. and designed the set of system icons. In other words, we have modernized the external view of OS/2. Now we can discuss how to attract new users. |
// надо на ENG!!
|
| Every conference is important. |

Warpstock Europe 2011Interview with Mark Dodel (active user) |
